- 16 June 2026
- By: Edge Admin
- in: Information
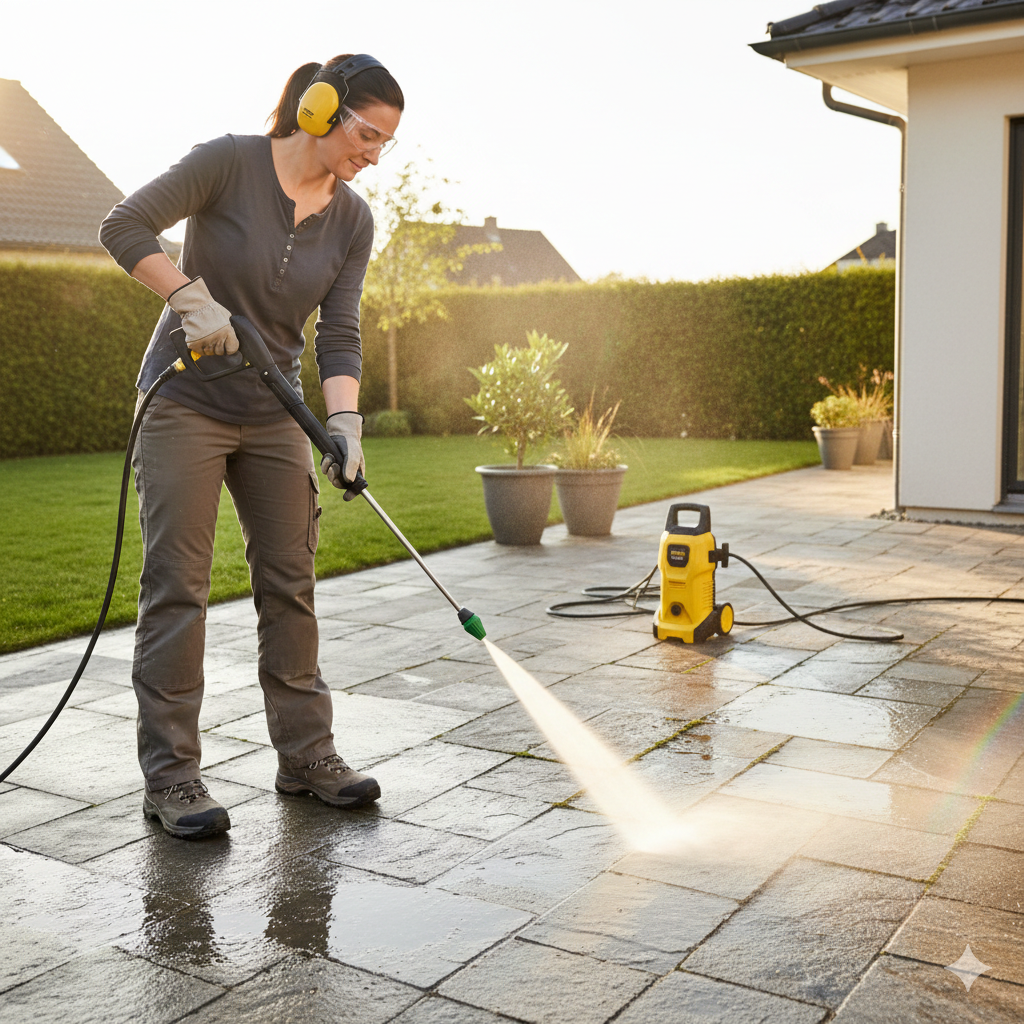
A grimy patio can detract from your outdoor oasis, but with a pressure washer, you can bring it back to life. While professional help is always recommended for extensive or delicate jobs, tackling your patio can be a rewarding DIY project if done correctly. This guide will walk you through the steps to safely and effectively clean your patio with a pressure washer.
Pressure washers are powerful tools that can cause serious injury or damage if misused. Always prioritize safety:
Read the Manual: Familiarize yourself with your specific pressure washer’s instructions and safety features.
Wear PPE: Always wear safety goggles or glasses, closed-toe shoes, long pants, and hearing protection.
Check Hoses and Connections: Ensure all hoses are securely connected and free of leaks.
Keep Distance: Maintain a safe distance from the nozzle and other people/pets.
Never Point at People or Animals: This is extremely dangerous.
Test a Small Area: Always start in an inconspicuous spot to test your technique and pressure setting.
Pressure Washer: Electric (lighter duty) or Gas (heavier duty).
Nozzle Set: Typically includes 0°, 15°, 25°, and 40° nozzles, and sometimes a soap/detergent nozzle.
Patio Cleaner/Degreaser: Choose an appropriate cleaning solution for your patio material.
Stiff-Bristle Brush: For scrubbing stubborn stains.
Garden Hose: For rinsing.
Safety Goggles/Glasses, Hearing Protection, Closed-Toe Shoes.
Gloves.
Clear the Patio: Remove all furniture, potted plants, grills, toys, and anything else from the patio surface.
Sweep Thoroughly: Use a broom to sweep away loose dirt, leaves, and debris. This prevents clogging your pressure washer and allows the cleaning solution to work directly on the grime.
Protect Nearby Plants: If using cleaning solutions, pre-wet any nearby plants with your garden hose. This helps dilute any overspray that might reach them. You can also cover delicate plants with plastic sheeting.
Seal Off: Close all windows and doors leading to your house to prevent water from entering.
This is crucial to avoid damaging your patio.
Start with a Wider Angle: Begin with a 25° or 40° (white or green) nozzle. These provide a wider spray pattern and lower pressure, reducing the risk of damage. The 0° (red) nozzle is extremely powerful and can etch concrete or damage softer surfaces – avoid it for general patio cleaning.
Match Pressure to Material:
Concrete & Pavers: Can handle higher pressure (15° nozzle, 2000-3000 PSI).
Stone (natural, softer): Use moderate pressure (25° nozzle, 1500-2000 PSI).
Wood/Decking: Requires low pressure (40° nozzle, 500-1000 PSI) and soft washing techniques to avoid gouging.
Always test a small, hidden area first!
For best results, especially with stubborn stains like mold, mildew, or oil, use a pressure washer-compatible cleaning solution.
Mix Solution: Follow the manufacturer’s instructions for diluting the cleaning solution.
Load Detergent: Most pressure washers have a siphoning tube or a dedicated detergent tank. Attach the soap/detergent nozzle (often black) to apply the solution at low pressure.
Apply Evenly: Spray the solution evenly over the entire patio surface.
Let it Dwell: Allow the solution to sit for 5-10 minutes (check product instructions), letting it break down the grime. Do not let it dry on the surface.
Attach Cleaning Nozzle: Switch to your chosen cleaning nozzle (e.g., 25° or 40°).
Maintain Distance: Hold the nozzle 6-12 inches from the surface.
Use Consistent Strokes: Start at one end of the patio and work your way across in overlapping, even strokes. Work in sections. Avoid stopping in the middle of a stroke, as this can leave noticeable lines.
Rinse Thoroughly: Once you’ve cleaned a section, rinse it completely to remove all cleaning solution residue and dislodged dirt. Work downwards if there’s a slope.
For very tough stains, apply more cleaning solution directly, let it dwell, and gently scrub with your stiff-bristle brush before re-pressuring washing.
You might carefully try a slightly narrower nozzle (e.g., 15°) on very tough concrete stains, but increase your distance from the surface and move quickly.
Rinse Again: Give the entire patio a final, thorough rinse with plain water to ensure all soap and dirt are gone.
Allow to Dry: Let the patio air dry completely before replacing furniture.
Work in Sections: This helps you manage the process and prevents cleaning solutions from drying out.
Overlap Strokes: Ensure you cover every inch of the patio for an even clean.
Consider a Surface Cleaner Attachment: These accessories connect to your pressure washer and cover a larger area quickly and evenly, reducing streaks.
Don’t Rush: Take your time to achieve the best results and avoid damage.
With these steps, you can confidently clean your patio with a pressure washer and enjoy a beautiful, refreshed outdoor space. Remember, if you’re ever unsure or have a particularly challenging job, Edgehire4homes is here to help with professional pressure washing services!
![]()
We specialise in hiring modern, reliable equipment delivered straight to your door, by our people, in our vehicles.